MakerSpace: If At First You Don’t Succeed, Try, Try Again

This MakerSpace challenge was simple: Use toothpicks and marshmallows to build the tallest free standing structure that you can. What could go wrong?

Sticky

Let’s just say, things got a little messier than I had been planning on.

mini


On our first try I gave the students toothpicks and miniature, store brand, marshmallows. The kids enjoyed the challenge, worked much better with partners than they did in their first challenge and persevered much better than they had before. The marshmallows were less than optimal. They were mushy and sticky and not big enough to provide enough structural support to really build with.


So we tried again. On our second try I bought full sized, name brand marshmallows. Try, try again.

large.jpg


Again, the kids enjoyed the challenge and began to learn the idea of reengineering when
they ran into failure. Try, try again. The marshmallows were still moist and mushy and sticky though.


So yes I will probably use this MakerSpace challenge next year, but I’ll open up the bag of marshmallows a day or two ahead of time to let them get a bit stale and less sticky. Try, try again.


Flexible Seating: The Verdict Is In

After out first week of flexible seating, the verdict is in. We love it.

I had the students contribute to a padlet to share their thoughts about flexible seating. They provided some pretty strong evidence in favor of it.

Flex Seat Padlet

My Testimony

This week we spent Monday-Thursday trying out all of the different types of seats. Each day a group of students was assigned to a type of seating they were required to use all day, either the low table, regular tables, standing table or the rug.

We had lots of discussions about which seats they liked, didn’t like and why. There were conversations about if they liked different kinds of seating for different activities and the students were very thoughtful in what they shared.

Friday was our first day of full blown flexible seating where they got to choose to sit wherever was best for them.

IMG_1647It went wonderfully.

The classroom seems much more humane. I suddenly feel like I had the kids locked up in their assigned seats at desks before, although I didn’t feel like that when I did. It is just so natural to allow them to move around the classroom and be comfortable. I was also surprised to find myself, on more than one occasion, counting the kids. I kept thinking I was missing someone because the room feels so much less crowded. In my tiny room that is quite an accomplishment!

Findings

IMG_1640It looks like the low tables are the most popular. I’m going to watch for another week or two and decide if I should lower another one of our regular height tables to make more low table seating.

The were only a couple of issues I had to address with the students. One was about taking care of the floor cushions. They need to be tucked under the desks when they’re not being used, and we need to be careful not to step on them.

I also had to clearly put a ban on seat stealing. If someone is using a seat, and they just get up for a minute to use the restroom or sharpen a pencil, you may not swoop in and steal their seat.
IMG_1637Interestingly, our “private desk” has been popular too. I may need to make a couple more of those.

But no, the students didn’t go crazy. They didn’t fight over seats, and our class hasn’t disintegrated into a collective of wild animals on the loose.

There are some simple routines that we’ve had established in the classroom, like passing out papers and collecting homework, that are getting adjusted now that our seating is different. I’m already sorting these things out and I’m sure we will settle into new and efficient routines soon.

Hearing From the Witnesses (parents)

Screen Shot 2016-03-26 at 10.00.22 AM.pngI sent out an email with a classroom update the weekend before we went to flexible seating. I explained to parents why and how I was doing this and even linked them to a video and research on the subject. They have also gotten some pictures and updates via our private classroom Twitter account.

The only parent feedback I have gotten so far is from one mother who emailed me to tell
me how wonderful she thought the idea was, and one father who came in the morning to see what all of his son’s excitement was about. I haven’t had a single negative comment or worried question.

Emancipated Minors

IMG_1656I am so glad that I have given my students the chance to use flexible seating. It isn’t just about having a comfy place to sit. It is also about the chance to add some variety into their day, trust them to make choices, and access the whole classroom. Now, instead of having one small desk that is theirs, the whole classroom is theirs to use as they need. I feel like I’ve given them a wonderful freedom and power with that.


MakerSpace: Because the E in STEM stands for Engineering

One of my goals this year, as I began my first year teaching 2nd grade, was to include regular MakerSpace activities in my classroom. It has been a roaring success!

Screen Shot 2016-03-20 at 2.00.30 AM

What Is MakerSpace

For myself I’ve defined MakerSpace as a time and space in our class for the kids to engineer. We need to get better at STEM and the E is for engineering. Since I’m focused on engineering I’m looking for activities that are not science experiments, and not art projects. I want to give the students freedom to design and build without structure but with an end product in mind.

For my sanity I’ve made our MakerSpace activities as challenges where students are given a set of materials and a task to accomplish. The task may be to build the tallest tower possible, or create a musical instrument.

Our First MakerSpace Challenge

We got started right away in the first week of school. After reading and discussing The Three Little Pigs I gave the students a challenge. Build a structure that can stand up to the Big Bad Hairdryer. Pairs of students were given a bag to build with. Some bags had dominoes in them, others sponge squares, and others craft sticks. I chose these materials because I had them in my cupboards. I encourage you to improvise and use whatever you have on hand.

IMG_0487.JPG   IMG_0505.JPG


When a group was done building we subjected it to the Big Bad Hairdryer. This always created a crowd. I love the expressions on the kids faces that this second picture caught.

IMG_0497       IMG_0498

After the Big Bad Hairdryer visited a group, the students could then clean up their materials and trade it in for a bag with different materials in it.

Debrief

After our MakerSpace time we talked a lot about perseverance. The kids shared that it was sometimes hard to work with a partner (they all wanted to build their own house, not work together to build a house). They also said that building with the craft sticks was hard and they wanted to give up.

There were also engineering conversations. There was a consensus that the sponges were the easiest to build with, but not very strong. The kids decided the dominos were the strongest because they were the heaviest. There was a general agreement that the craft sticks weren’t good at anything.

The Verdict

This was the first MakerSpace project for both the kids and I, and it was a complete success.

I learned that groups of 2 are better than groups of 3 if you want all the kids to stay involved.

The kids learned how to persevere. It took considerable encouragement and help to get some of them to keep trying. I also see now (6 months later) how much better the kids have gotten at problem solving and sticking with it.

Flexible Seating: Here We Go!

On Monday morning Room 1 is going to flexible seating!

Pintrest, Twitter and blogs have inspired me to make this move and have helped me find my way. And Ikea too. I thought I’d share my own journey into flexible seating in case it may be a help to others.

How I Got Here

This is my first year teaching 2nd grade and when I moved into my new room I told my principal I didn’t want desks: I wanted tables. It was a great decision.

IMG_0475

Book cover chair pockets

My kids had chair pockets to hold classwork and a book to read as well as a pencil box. Text books were kept in the cupboard. Scissors and glue were kept on the counter. I loved it. We changed seats in 2 minutes by simply moving chairs and pencil boxes. We rearranged tables to make room for rainy day P.E. yoga sessions and students were seated in collaborative tables, not individual desks.


Already having gotten rid of desks, and seeing how well we did without desk space, has helped me realize how do-able flexible seating is.

Why Flexible Seating

Screen Shot 2016-03-19 at 11.22.11 PM

Pintrest: Where Teachers Beg Borrow and Steal Ideas

I think I first heard about flexible seating a few weeks ago in my Twitter feed. The more I thought about it and searched hashtags and Pintrest boards and research articles the more it made sense to me.  It makes sense to give my students the option to be more comfortable, more engaged, more responsible, more human.
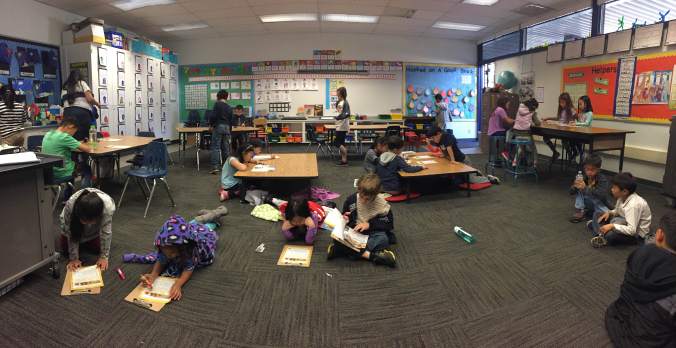
Our Setup

I’ve created four different seating areas for the kids.

IMG_1628.JPG

I kept 3 of our tables at regular height. Kids can sit in a chair, or on one of the 4 low stools I bought.


IMG_1632.JPG


I rearranged our furniture to give us a bigger rug space. If I can do it in our tiny room anyone can! Pillows, cushions and lap desks will be delivered soon. For now we’ve got clipboards and the fleece blankets we use when we go outside.


IMG_1630.JPG

Our amazing custodian helped me swap out our kidney table for this long table that I put up on bed raisers. Kids can stand up here, or sit on one of the tall stools.
IMG_1629.JPG

I took the legs off of 2 of our tables. Chair cushions will be arriving soon, but for now I’ve folded up some of our fleece blankets for kids to sit on.


Rules and Procedures

My students now have assigned seats on the rug.  This is where we’ll gather when we need everyone in the same place. We’ll probably have more instruction time on the rug, and I feel like we could use the structure of assigned seats.

In our first week every student will try every type of seat. We have 4 rows of students on the rug and 4 types of seating. On Monday the front row will use the low desks, on Tuesday they’ll get the high desks . . . . by Friday students will have tried all of the seating areas and be ready (hopefully) to choose their own seat.

Students will be told, “Choose a seat where you work well.” and “Ms. Grumm may change your seat at any time.” I plan to tell them they may choose a different seat from day to day and from activity to activity but that they shouldn’t switch seats in the middle of an activity unless there is a big reason. I’ll let you know how it goes.

Shopping List

Things I already had, or scrounged up:

  • a class set of pencil boxes
  •  a class set of clipboards
  • a class set of fleece blankets (they used to be just for outdoor use)
  • 3 inflatable balance cushions
  • 3 regular height tables
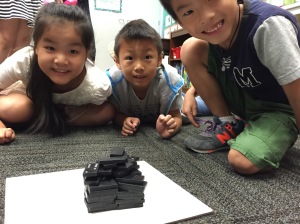
  • 2 tables that I removed the legs from to make them short
  • 1 long table I raised up to be a standing table

Things I purchased:

Screen Shot 2016-03-20 at 12.06.05 AM.png

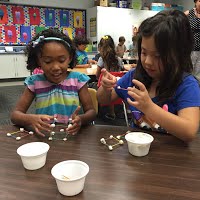
26 Book Bins from Lakeshore : along with the pencil boxes we already have, this is where students will keep their materials

Screen Shot 2016-03-20 at 12.10.48 AM

4 Marius stools from Ikea: these are the perfect height to put at our regular height desks as a seating alternative to chairs

Screen Shot 2016-03-20 at 12.14.28 AM

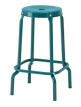
4 Raskog bar stools from Ikea: these taller stools should be perfect as a seating option at our taller “standing” table


Screen Shot 2016-03-20 at 12.18.07 AM

8 outdoor chair cushions from Bed Bath and Beyond: I’ll have these available for kids to use at the low table or if they’re working on the rug.


Screen Shot 2016-03-20 at 12.21.12 AM


4 Letter Square Throw Pillows from Bed Bath and Beyond: These should be great for kids to use to lean up against the wall, or spread out on the floor.


Screen Shot 2016-03-20 at 12.28.14 AM.png

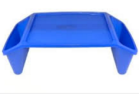
4 Lap Trays from Autism-products.com: We’ll have these for students who choose to work on the rug


Screen Shot 2016-03-20 at 12.35.39 AM.png

1 set of Bed Raisers from Bed Bath and Beyond: I used these on our long table to raise it up 5 inches to make our standing table

Things I still want:

  • Wobble Chairs: I think I can handle these better than balls
  • A large rug: So our rug area can actually have a rug
  • A coat rack: In southern CA we don’t take coats very seriously so my kids used to just hang their jackets on their chairs, but now if they don’t have a chair . . .
  • Whatever I learn we need: It will be interesting to see what the kids like and don’t like. Maybe we’ll need more stools, or lap desks, or . . . . .

Stay Tuned

I’ll keep posting as we continue on our journey into flexible seating. You can smile at our successes and laugh at my failures, I give you full permission.